


This post assumes that you have some knowledge of React. If this is not the case, feel free to give it a try, anyway!
Being a front-end or full-stack developer, you might, at some point in your career, stumble upon a project for multiple platforms, such as web and mobile. Until a couple of years ago, if this happened, your only choice would be to create at least three different applications, one for web, one for Android, and one for iOS (if you were brave enough, you could venture into the world of Windows Phone, but… not recommended).
Introducing React Native
Luckily for us, there have been some initiatives that tried to unify the code among different platforms, and one of the most prominent is React Native.
React Native unifies the development of mobile apps. This means you only need to develop a single app for both Android and iOS (and there is also a project that enables you to develop for Windows 10 as well!).
However, the web is still isolated when it comes to sharing… for now at least. As you can imagine by their names, React and React Native share many similarities that enable some sort of interchange of code between mobile and web. The first step to understanding code sharing is to understand what they share. (By the way, the motto of React “Learn once, write anywhere” as you can see from the need of a post like this, is not quite accurate).
Comparing React and React Native
Writing code in React and React Native is pretty similar. It is actually so similar that it’s easier mentioning what differ between them rather than pointing out their similarities, and this list is not long. The fundamental difference is that in React you will, at some point, render HTML elements, but in React native, instead of doing this, you will render pre-defined components, imported from the React Native library (you can easily find the list of components on the React Native Website).
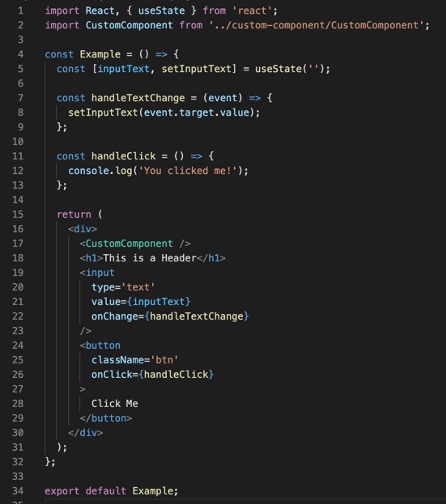
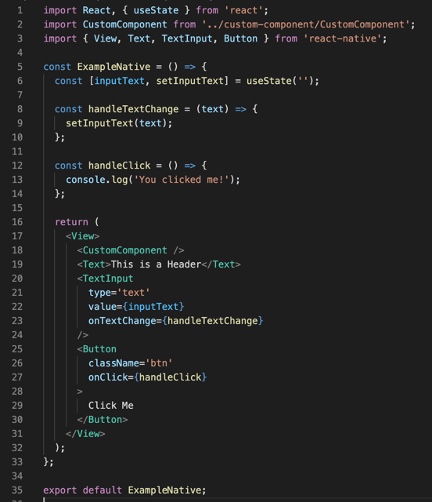
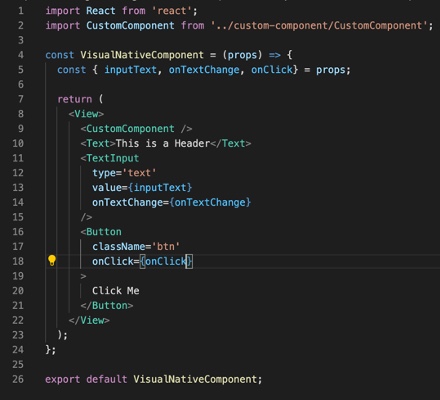
In the image below you can see a comparison of two components, one for React and the other for React Native, that try to achieve the same functionality. It is easy to perceive some sort of equivalency between the components used by each one, such as the equivalency between divs and Views, for example.
Another point of difference is the way they handle CSS. React is more flexible and lets you handle CSS in a couple of different ways, with the possibility of using CSS preprocessors. On the other hand, React Native has some rigid rules when it comes to styling your components.
Here we have some ways in which you can style CSS in React.
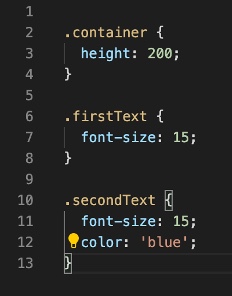
Using classNames, which can be combined with Sass, Less, or any other CSS preprocessor:
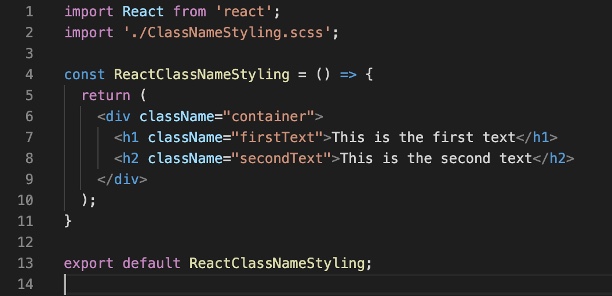
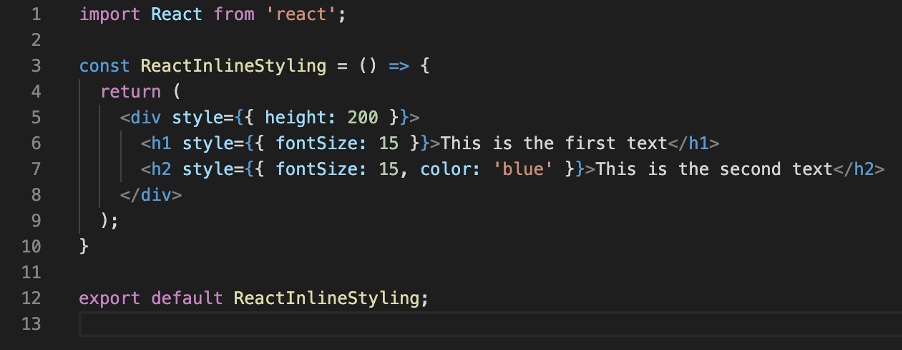
With inline styling, which can be achieved directly in the elements themselves, as in the picture below.
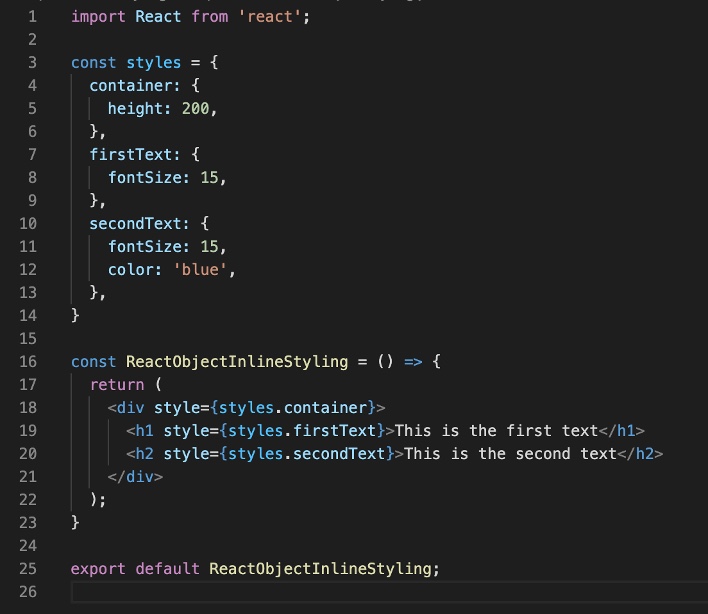
Or isolated into a separate object or even file.
Additionally, you could use libraries such as Styled Components to enhance the usage of styling in React.
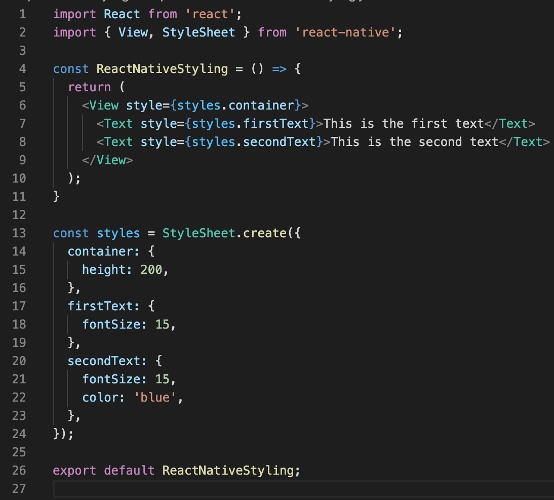
In React Native, however, we don’t have the option of styling it with classNames and CSS preprocessors. We can use inline styles directly in the components, or, as is the recommended way, using the Stylesheet.create()function, and passing the objects as the image shows:
Also, the Styled Components library mentioned for React is available for React Native as well.
How to share code
Now to the important part. How can we share the code? In the examples, you might have already realised that the logic of both components, as well as the code for this logic, is exactly the same. So why write it twice?
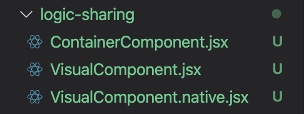
Here is an example of how to share code by separating the logic into a component and having two specialised components for the visual parts of each application.
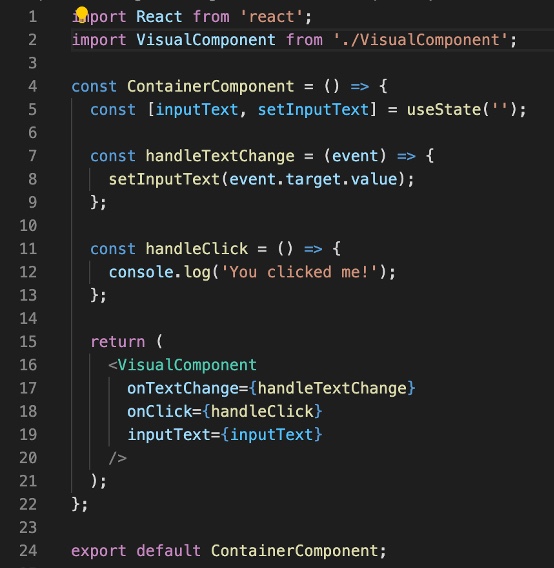

You can see from the images above that we can use just one logic component along with two visual ones as children of the first one, rendering either web or app components, depending on which platform you’re using. This can be done either with class or with function components, using Redux or not, since everything regarding component logic that exists in React is accepted by React Native as well.
In this Parent-Child scenario, we have a powerful ally: Babel. With Babel you can use the import function on the parent component, without having to worry about any kind of conditional usage of the component. Babel can automatically decide which import to use on the parent component, depending on how you build your project. To do this, you can simply have both components, web and app, in the same folder, with different extensions. One with “.js” (or “.ts” if you’re using TypeScript), and one with “.native.js” (or “.native.ts”). You can see this pattern in the parent component of the example mentioned just above.
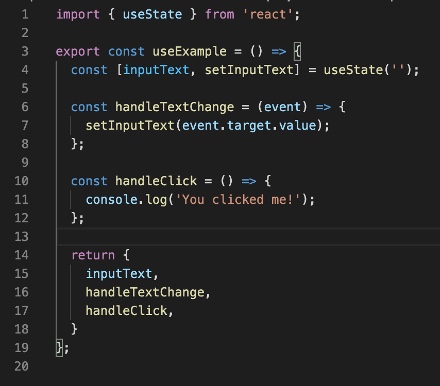
If you are using hooks, you can also separate the logic into a custom hook, returning the necessary variables and functions that you need for your logic. You can see this behaviour in the example below (and you can read more about custom hooks here).
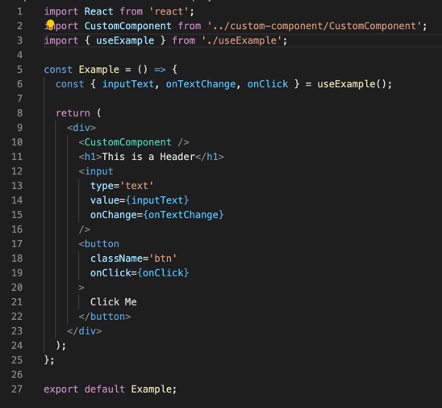
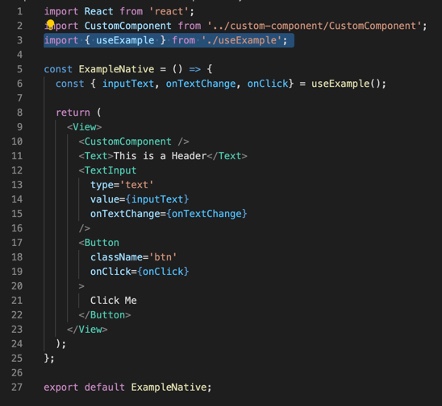
The advantage of using this method in comparison to the Parent-Child one is that we don’t depend on having the files in the same folder for Babel to interpret. This gives you the possibility of having them in separate repositories without any issues, which can be quite useful for a lot of use cases.
Sharing CSS
Coming back to CSS, we saw that React and React Native have a way of sharing styles in common. This is done by declaring a style in a JSON object, and loading it in the style attribute of the components. In order to achieve a shared stylesheet, we could share the styles as in the image below.
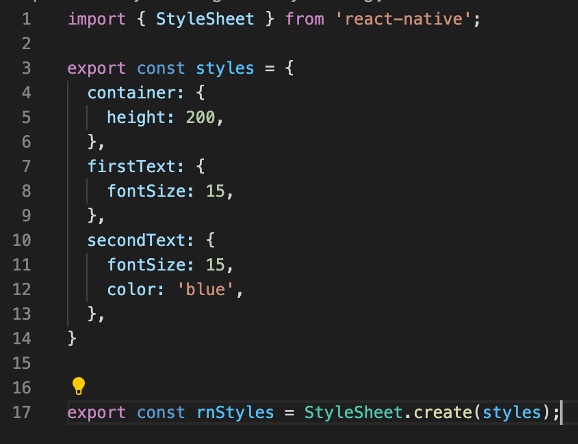
It would even be possible to extend the object to achieve two separate styles based on a common shared one. However, sharing styles is something that might be too hard to maintain, perhaps requiring even more time than to handle two completely separate style definitions. Therefore, if you decide to venture into this quest for unification, be aware that it might be a not-so-rewarding one (and please let us know how it went).
Use case: Adding WordPress
Here at SPRYLAB, the project we envisioned sharing code had one big issue. Our client also wanted the flexibility to rearrange the components on their website, according to their own will. This made the team opt to use WordPress for the web part of the application, and that also meant experiencing more difficulties when trying to share code.
WordPress currently uses React to render its widgets. However, each different widget is loaded separately from the PHP files, and is like one separate react instance. This means that the part of the application that unites all the components is actually handled by PHP, and not JavaScript. For this reason, we wouldn’t be able to have one single context or store to share the states between the necessary components. Therefore, we came to the conclusion that the part of the logic that we would be able to share would be an intermediate level between a global state and the visual components. However, the time that we would have to spend to make this happen would be similar to the time spent on creating entirely isolated logics.
In the end we decided that, for our specific case, it was not worth trying to share whole components, and we stuck to sharing some specific functions, specially the ones that made the backend API calls. We also had TypeScript definitions, localisation files, assets, and configuration functions in our shared repository, which we easily added to each of the specific repos using the “git+ssh” option for our package.json files.
Looking back in time, maybe it would have been possible to use additional custom functions/hooks, similar to the “useExample” presented in one of the images above, and extend these functions in each part, whenever necessary. However, we would still be quite limited by what we would be able to do.
Next step: Unifying the code
To end this blog post, let’s go a little bit further, and talk not only about sharing code, but about having a single unified code. Currently this can be achieved with libraries such as React Native for Web, which enables you to write one single React Native code that will be converted for web, and with Flutter, which is a new framework from Google that is considered their answer to React Native, and might be the topic of some future post. But until then, stay safe and I’ll see you around!